So befestigst du eine Spreaderbar an deinem Trapez
Du hast deine Spreaderbar, du hast dein Trapez – super – was kommt jetzt?
Du hast deine Spreaderbar, du hast dein Trapez – super – was kommt jetzt?

Connecting your spreaderbar to your harness correctly could make or break your session – literally. If you’re new to kitesurfing and looking for some guidance, you’re in the right place. In this blog, we’ll walk you through how to make sure your harness fits just right, the different types of spreaderbar hooks out there, and what each one is best suited for. Then, we’ll take you through a step-by-step guide on how to set up your spreaderbar for optimal safety and comfort, along with a few quick tips to ensure everything’s dialed in.
If you’ve already got your kitesurf gear sorted, feel free to skim through this section. But it’s always a good idea to double-check your harness size to make sure you’ve got the perfect fit for maximum comfort and performance.
First off, everyone needs a harness and a spreaderbar to go kitesurfing or windsurfing. You can’t have one without the other. However, it’s good to keep in mind that some harnesses are sold with a spreaderbar, and some are sold without one. In our range, models like the Warrior X, Majestic X, Majestic, Stealth for men and the Gem series for women are sold without a spreaderbar.
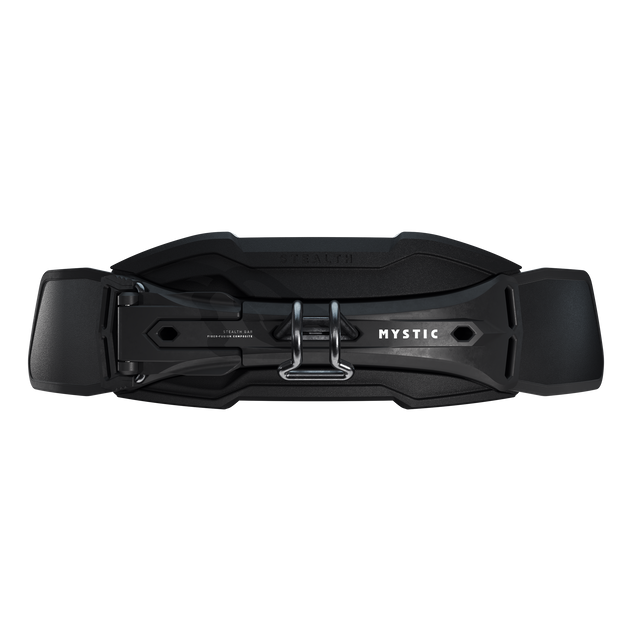
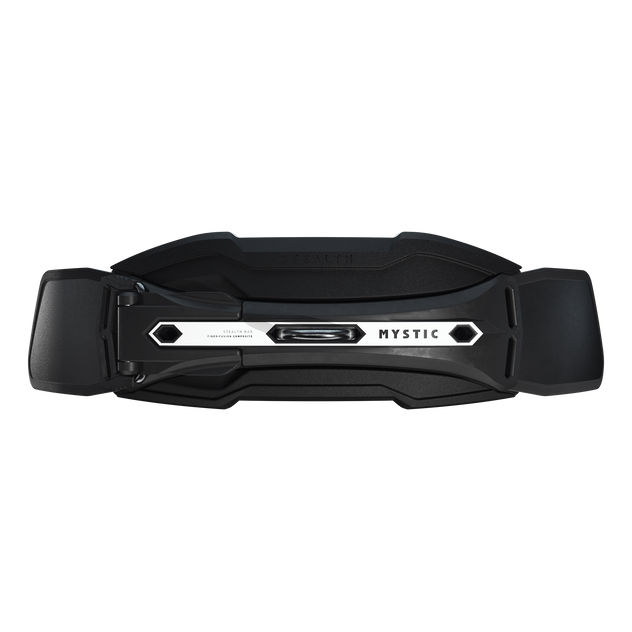
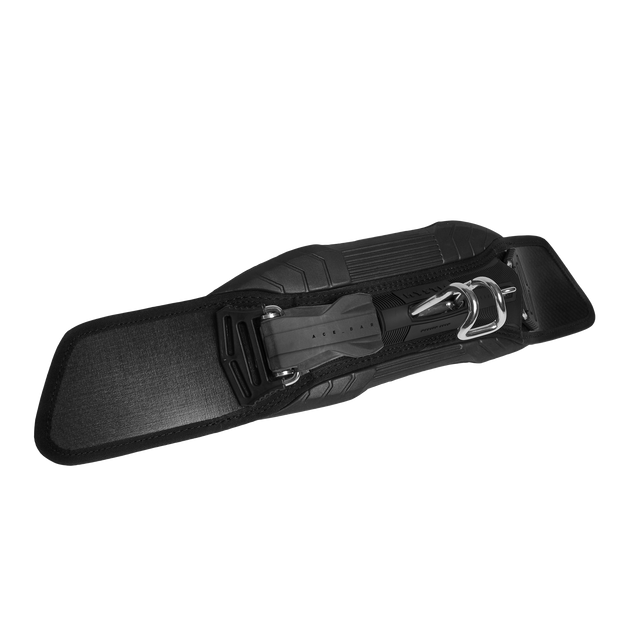
When it comes to spreaderbars, you can choose between Mystic’s Stealth Bar and Ace Bar. The Stealth Bar is our premium option, known for its super slim and lightweight design, optimized ergonomics, and minimal pressure points. The Ace Bar features a slightly bulkier Lever Lock, but it still provides excellent comfort and performance.
Before selecting the right spreaderbar, you need to make sure your harness fits perfectly. A waist harness should sit snugly around your waist, just below your ribcage. The waist belt should cross over your belly button. The shape of the harness should rest comfortably along the small of your back.
Once you’ve nailed down the right harness fit, use the size chart below to find the ideal spreaderbar size.


Now that we’ve gone through sizing, it’s time to narrow down your spreaderbar choices in terms of hooks. The spreaderbar hooks should be chosen in line with your riding style and goals.
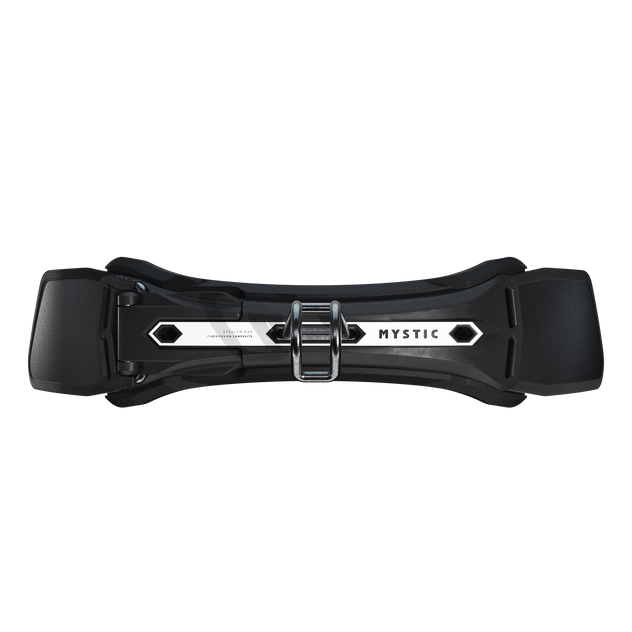
Kite Hook
This is the classic hook that’s been used for decades and is ideal for disciplines like Big Air and Freeride. One thing to keep in mind is that the length of the hook can make it a bit challenging for riders with shorter arms or kids to reach the bar when it’s fully extended away from the Quick Release.
Freeride Loop
It makes it easier to reach the bar when it’s pushed away and helps reduce strain on your arms by minimizing the power from the kite coming from various angles. Safety-wise, this is the best option if you’re not doing any unhooked tricks. The closed loop design requires you to check your Quick Release before hitting the water and prevents accidental releases, unlike the open-bottom kite hook. Just remember to remove the safety finger, as it’s not needed with this loop.
Slider rope
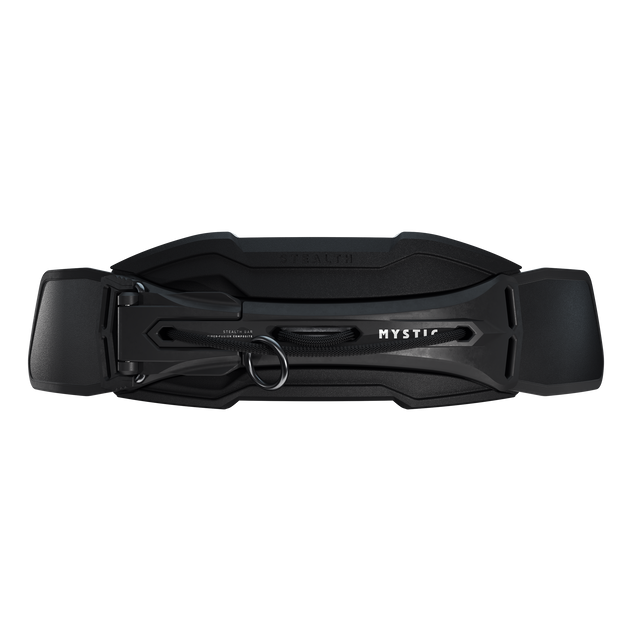
Do you kite foil or ride with a surfboard? If so, this is the option for you. The slider rope, secured by a Surf Slider, allows the Quick Release to move naturally from left to right as you turn, adapting to your body’s movement. This spreaderbar setup is perfect for quick transitions and riding through waves, making it much easier to ride toeside and navigate in dynamic conditions.
Note that by looping both the main and mid rope together, you create a redundant safety system. This means if one rope eventually breaks, you'll still be attached to the second one. We recommend using both ropes when going big with this spreader bar. Keep in mind that the rope will need to be replaced as it wears down over time.
Windsurf hook
Designed specifically for windsurfers, this hook features a lower profile and additional padding to minimize pressure points, providing extra comfort. Perfect for all of our windsurfers out there!
Wrap your harness around your waist and secure it with the battle belt/velcro. It should fit snugly but not too tight—just enough to hold your harness in place comfortably while you adjust the spreaderbar in the following steps.
Insert the left Stealth Wings into the designated pockets on your harness, ensuring they are securely in place.
Slide the two straps (also known as webbing) on the left side of your harness through the left openings on your spreaderbar, and attach your adaptive leash eye to the top strap. The leash should be connected to the left side of your harness, as the right side is where the harness opens. Make sure to loop both straps back through the ladder buckle securely. Then, thread the straps through the webbing connector on the right side and back through the ladder buckle again. Check that your straps are even and not twisted.
Tighten the straps for a comfortable fit by pulling them upwards, ensuring they’re even on both sides. Pro tip: pull the straps backward first, then forward, for an even tighter and more secure fit.
Once all the straps are adjusted and your harness fits securely, roll up the excess webbing into neat 8 cm loops and tuck them into the side covers. Close it off with the closure system. This way, next time you’re ready to hit the water, you can simply use the Lever Lock to secure your harness without needing to readjust the webbing every time!

- Regular Checks: Always check your harness for comfort and safety before each session. If something doesn’t feel right, don’t hesitate to ask your local retailer or an instructor for guidance.
- Rinse After Every Session: Rinse your harness with fresh water after each use to keep it in top condition and extend its lifespan.
- Avoid Sun Exposure: Don’t leave your equipment in direct sunlight for extended periods, as this can cause damage and reduce its durability.
- Inspect for Wear and Tear: Regularly check your harness and spreaderbar for any signs of wear and tear, and replace parts as needed to ensure your safety and performance on the water.
- Slider ropes: To check for wear and tear, inspect the black outer sleeve of the rope. Lift the spreaderbar padding and check the four connection loops of the white inner rope. There should not be any visible damage.

Related products
Choose your Mystic spreaderbar based on your sport and how you ride. Choose Stealth Bar Gen 3 Kite if you want a classic kite hook for freeride, big air and freestyle. Choose Stealth Bar Gen 3 Freeride if you ride hooked-in and want a freeride loop setup. Choose Stealth Bar Gen 3 Surf if you ride surfboards, kite foil or want more side-to-side movement from a slider rope. Choose Stealth Bar Gen 3 Windsurf if you need a windsurf-specific hook. Choose Ace Bar Kite if you want a reliable and more accessible kite spreaderbar option.
The Stealth Bar is our premium spreaderbar range. It is designed to feel slim, lightweight and ergonomic, with reduced pressure points and a more refined fit against the harness. The Ace Bar is the more accessible option. It has a slightly bulkier Lever Lock, but still gives strong comfort, connection and performance. Choose Stealth Bar if you want the most advanced fit and feel. Choose Ace Bar if you want a dependable spreaderbar at a more accessible level.
Choose a Kite Hook if you want the classic kiteboarding setup for freeride, big air or freestyle. Choose a Freeride Loop if you stay hooked in and want easier bar reach, less arm strain and a closed-loop setup for freeride riding. Choose a Slider Rope if you ride a surfboard, kite foil or want more freedom through toeside turns and wave riding. Choose a Windsurf Hook if you are windsurfing and need a lower-profile hook with extra comfort and padding.
Start by making sure your harness fits correctly. A waist harness should sit snugly around your waist, just below your ribcage, with the waist belt crossing over your belly button. The back of the harness should sit comfortably along the small of your back. Once the harness fit is correct, choose the spreaderbar size using the size chart on the product page. The right spreaderbar should sit securely across the front of the harness without creating pressure points or feeling too narrow.
Why have I not received an order confirmation email? Please check if you have received an order confirmation within 2 hours after placing the order, it could be the case it ended up in your spam folder.
Your spreaderbar straps should be tight enough to keep the bar secure and stable, but not so tight that the harness becomes uncomfortable or creates pressure points. Tighten both sides evenly so the spreaderbar stays centred. Pull the straps back first, then forward, to get a tighter and more secure fit. Once everything feels locked in, roll up the excess webbing into neat loops and tuck it into the side covers so it does not flap around while riding.
Before every session, check that your harness feels comfortable, the spreaderbar is centred, the webbing is not twisted and the straps are tightened evenly. Make sure the Lever Lock closes properly and the adaptive leash eye is attached on the correct side. If you use a Slider Rope setup, inspect the rope for wear before riding. Check the outer sleeve and the connection loops, and replace the rope when it shows visible damage. After each session, rinse your harness and spreaderbar with fresh water and avoid leaving them in direct sunlight for long periods.